Who likes chocolate? Well… I’m pretty sure most of you reading this do. But today I’m not talking about just chocolate. I’m talking about pralines.
Every country has its own chocolate specialties and those irresistible shop windows that put you in front of the hardest decision ever:
Should I go in… or should I pretend I didn’t see anything and keep walking? 😄
I live in Belgium and, yes, besides beer and frietjes (fries), this country is very serious about chocolate. So you can only imagine (or maybe you’ve experienced it yourself) how difficult it is to walk past a chocolatier without stopping when you’re surrounded by rows and rows of beautiful pralines — or bonbons, as they’re called here.
And now the big question: what’s the correct name?
Pralines, bonbons… even in Italian my native language, things get a bit confusing. But hey — I had to choose one, and I promise you this: once you read on, you’ll know exactly what I mean.
What is a praline?
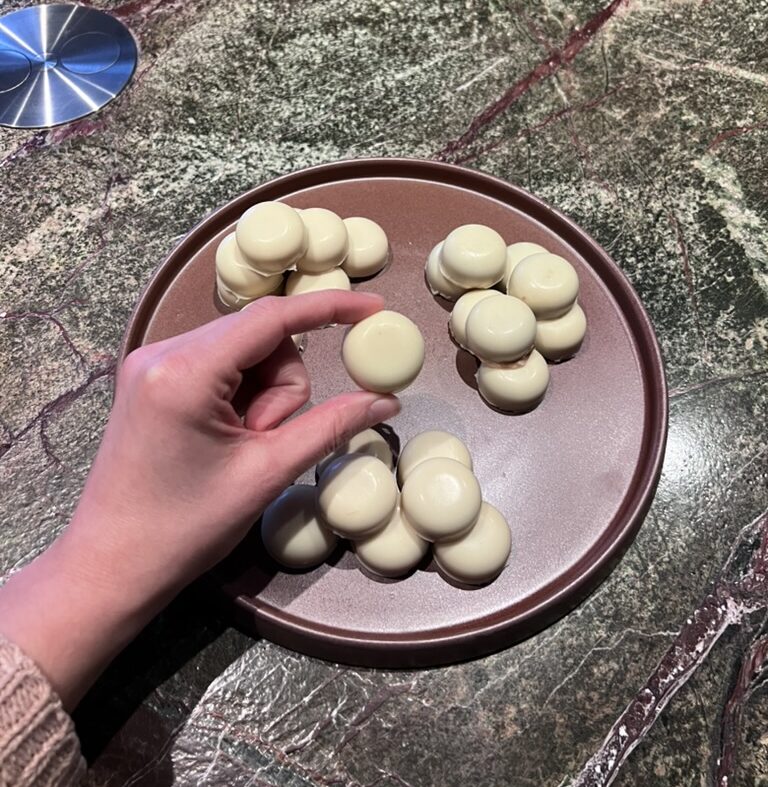
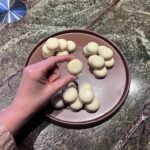
A praline is a small, bite-sized chocolate with a filled center. The outer shell is made of chocolate (dark, milk, or white), while the inside can be filled with almost anything you can imagine: chocolate creams, nut pastes, gianduja, praline paste, fruit fillings, caramel, marzipan, liqueurs… and so much more.
What makes pralines so special is this contrast between the thin chocolate shell and the soft, flavorful filling inside. Each bite is a surprise, and that’s exactly why they’re so loved.
They may look fancy and “professional”, but trust me — with a bit of patience, they can absolutely be made at home.
How I started…
I’ve watched more than enough Netflix shows and series about food — desserts and pâtisserie included. I love them. I truly believe that some people are simply gifted when I see what they’re able to create.
Have you ever seen what Amaury Guichon makes? If not, go take a look at his videos on social media… pure art.
Now, let’s be clear: I’m not at his level, and I will never be — and that’s perfectly fine. The point is that he inspired me. And one day I thought: why not try this at home?
So I started reading, searching, watching videos… with absolutely no clue where to begin. And somehow, before fully understanding the process, I already had chocolate and praline moulds at home. Classic me. 😄
My first attempt? Pure dark chocolate shells filled with almond cream and marzipan soaked in Amaretto liqueur.
Honestly? Delicious.
And I wasn’t the only one thinking that. My husband, family, and friends all tried them — and they loved them too. That excitement pushed me to make more.
I’ll be very honest with you: I’m still learning and fine-tuning the technique. But this is exactly why I recommend it so much. Making pralines is fun, creative, and incredibly satisfying.
What you need
Chocolate
Choose the chocolate you love most. I personally use Callebaut because I love the quality, but feel free to use any brand you trust.
I don’t give an exact quantity because it depends on how many pralines you want to make. As a reference, I usually use about 400 g of chocolate, which gives me around 24 pralines.
Chocolate moulds
Choose moulds that are suitable for the fridge (and ideally also heat-resistant, in case you want to use them for other recipes in the future).
Filling
Here you can really let your creativity run wild. You can make your own fillings at home or buy ready-made ones from the supermarket. I’ve tried white roasted almond fillings I found near my house, and they worked perfectly.
Two pots
You’ll need them to melt the chocolate au bain-marie (water bath).
A thermometer
Very important to check the chocolate temperature while melting and tempering.
Tablespoons and teaspoons
Useful for filling the pralines neatly.
A dough scraper
This helps remove excess chocolate and create a clean, flat finish.
How to make pralines: step by step
- Take ⅔ of the chocolate and melt it au bain-marie (water bath).
- Keep the thermometer in the chocolate and heat it until it reaches 45°C.
- Remove the pot from the heat and add the remaining ⅓ of chocolate, stirring until everything is completely melted.
This process is called tempering, and it’s essential to give the chocolate a shiny finish and the right snap. - Pour the melted chocolate into the moulds. You don’t need to fill them completely — just enough to coat the sides.
- Gently move and tilt the mould so the chocolate covers the borders of each cavity.
- Turn the mould upside down to let the excess chocolate drip out, creating space for the filling. Make sure the shell isn’t too thick, otherwise the pralines will be hard to bite.
- Place the mould in the fridge for at least 30 minutes.
- Take the mould out and carefully add your prepared filling using teaspoons.
- Cover the mould with the remaining chocolate to close the pralines. Use the dough scraper to smooth the surface and remove excess chocolate.
- Put the mould back in the fridge. After 30 minutes you can already taste one, but for the best result, I recommend leaving them in the fridge for at least 12 hours.
Ready to try?
I’d love to hear about your experience — and especially how delicious your homemade pralines turned out.


Leave a Reply